Cupping therapy has become increasingly popular as a natural method for relieving muscle pain, improving blood circulation, and promoting relaxation. This ancient healing technique, commonly used in traditional Chinese and Middle Eastern medicine, involves placing special cups on the skin to create suction. While many people visit professionals for treatment, learning how to do cupping therapy at home can help you enjoy its benefits conveniently and affordably.
However, it’s important to practice cupping therapy carefully to avoid injuries or skin irritation. In this guide, we’ll explain the basics of cupping therapy, its benefits, step-by-step instructions, and important safety tips for beginners.
What Is Cupping Therapy?
Cupping therapy is a form of alternative treatment where cups are placed on the skin to create suction. This suction helps:
- Improve blood circulation
- Reduce muscle tension
- Relieve pain and inflammation
- Promote relaxation
- Support recovery after physical activity
There are two main types of cupping:
- Dry cupping – Uses suction only
- Wet cupping – Involves small skin incisions (should only be done by trained professionals)
For home use, dry cupping is the safest and most recommended method.
If you’re wondering whether this therapy is effective, you can also read our detailed guide on does cupping therapy really work to understand its potential benefits and limitations.
Benefits of Cupping Therapy at Home
Many people use cupping therapy to manage everyday aches and stress naturally. Some common benefits include:
1. Relieves Muscle Pain
Cupping is widely used for neck pain, shoulder tightness, back pain, and sports-related muscle soreness.
2. Improves Blood Flow
The suction created by the cups stimulates circulation, helping oxygen and nutrients reach tissues more efficiently.
3. Helps with Stress and Relaxation
Many people feel deeply relaxed after cupping therapy because it helps release muscle tension.
4. Supports Sports Recovery
Athletes often use cupping therapy to improve recovery after workouts or injuries.
You may also find our article on what are the benefits of sports massage helpful if you’re interested in natural recovery therapies.
Things You Need for Home Cupping Therapy
Before starting, gather these basic supplies:
- Silicone cups or vacuum cupping set
- Massage oil or coconut oil
- Clean towel
- Mild soap or sanitizer
Silicone cups are usually best for beginners because they are easier and safer to use than fire cups.
How to Do Cupping Therapy at Home
Step 1: Choose the Right Area
The best body areas for home cupping include:
- Upper back
- Shoulders
- Thighs
- Calves
Avoid sensitive areas like:
- Face (unless specially trained)
- Spine bones
- Varicose veins
- Broken or irritated skin
Step 2: Apply Oil
Apply a small amount of massage oil to the skin. This helps the cups glide smoothly and prevents discomfort.
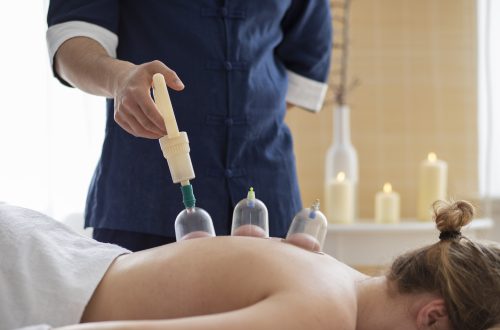
Step 3: Create Suction
For silicone cups:
- Squeeze the cup gently
- Place it on the skin
- Release slowly to create suction
For pump cups:
- Place the cup on the skin
- Use the hand pump to create mild suction
Do not create excessive suction, especially if you’re a beginner.
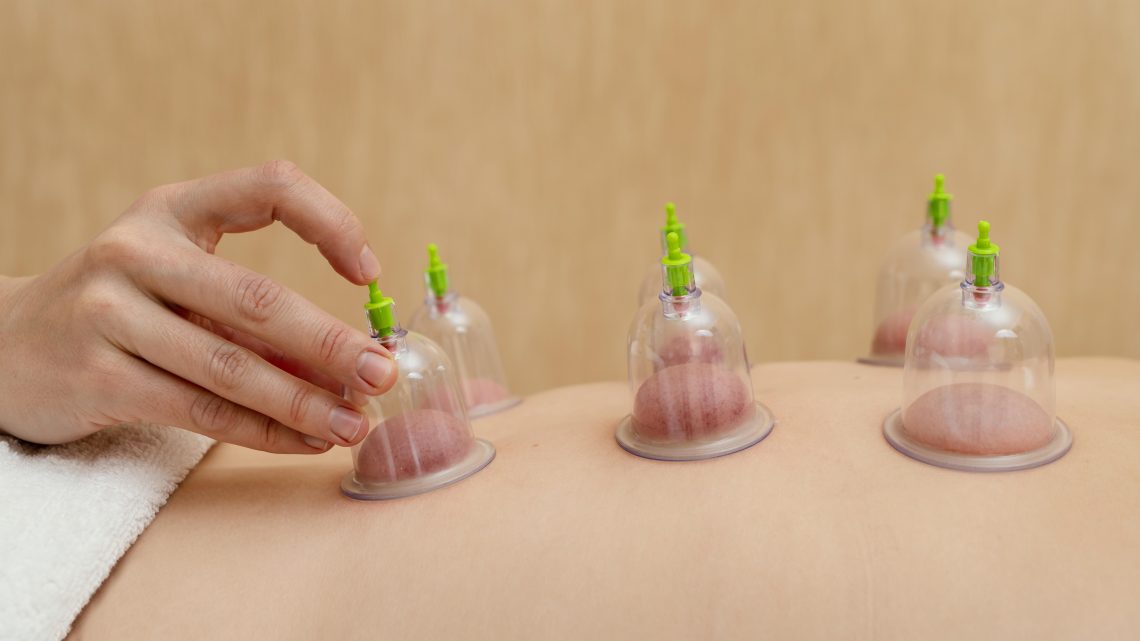
Step 4: Leave the Cups in Place
Keep the cups on the skin for:
- 5–10 minutes for beginners
- Up to 15 minutes for experienced users
You may notice circular red or purple marks afterward. These are normal and usually fade within a few days.
If you’re concerned about discomfort, check out our guide on is cupping therapy painful to understand what sensations are normal during treatment.
Step 5: Try Moving Cupping (Optional)
Moving cupping involves gently sliding the cups across oiled skin to massage muscles. This technique is especially helpful for:
- Back stiffness
- Shoulder tightness
- Muscle soreness
Move slowly and avoid dragging the cup too aggressively.
Safety Tips for Home Cupping Therapy
While cupping is generally safe, following proper precautions is very important.
Avoid Cupping If You:
- Have skin infections or wounds
- Have a bleeding disorder
- Are pregnant (unless approved by a doctor)
- Have severe medical conditions
- Take blood-thinning medications
Additional Safety Tips
- Never leave cups on too long
- Avoid excessive suction
- Clean your cups before and after use
- Stop immediately if you feel severe pain or dizziness
If you’re considering combining cupping with other therapies, you may also want to learn about what is dry needling and how it differs from cupping therapy for pain management.
Common Side Effects of Cupping Therapy
Most side effects are mild and temporary, including:
- Circular marks or bruising
- Mild soreness
- Skin redness
These usually disappear within a few days. Drinking water after treatment can help support recovery.
When to Seek Professional Help
Home cupping works best for mild muscle tension and relaxation. However, you should consult a professional therapist if you experience:
- Severe pain
- Persistent swelling
- Numbness or tingling
- Chronic muscle problems
Professional physiotherapists and cupping therapists can provide more advanced treatment safely.
Final Thoughts
Learning how to do cupping therapy at home can be a great way to manage muscle tension, stress, and body pain naturally. With the right equipment, proper technique, and safety precautions, beginners can safely enjoy many of the benefits of cupping therapy from the comfort of home.
However, moderation and caution are key. Always listen to your body, avoid overdoing the treatment, and seek professional advice if you have underlying health conditions.